How to Print Your Own Card Deck at Home
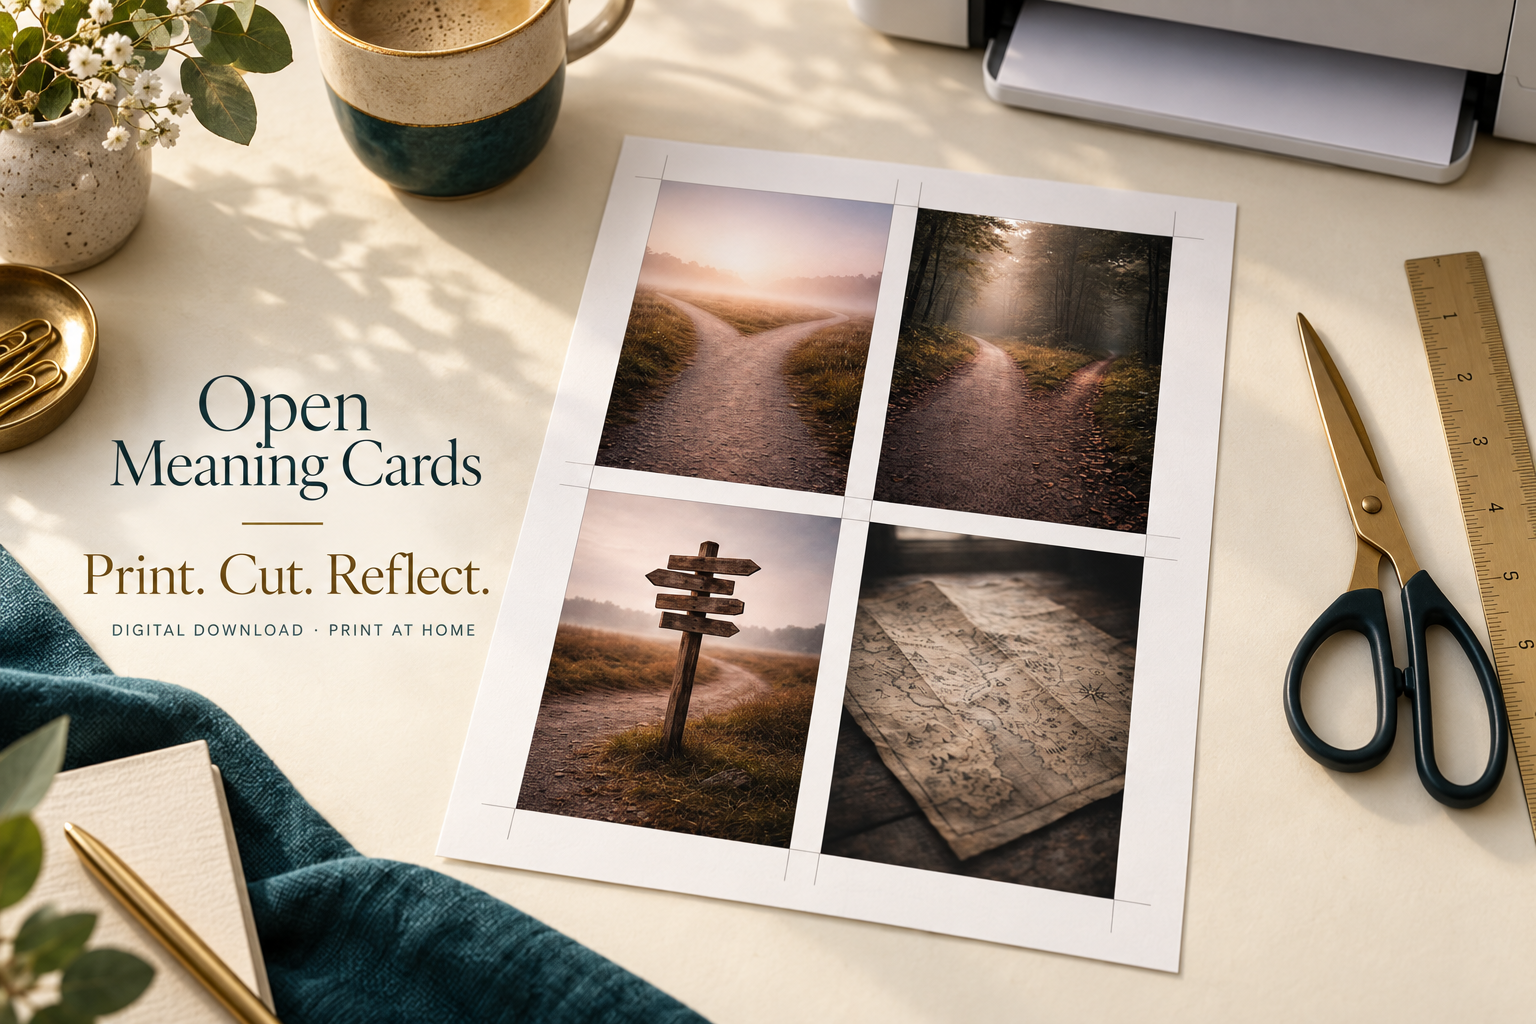
Learning how to print cards at home comes down to four things: heavy matte paper, printing at 100% scale, cutting on the lines, and testing one sheet before you print the whole deck. With 250–300 gsm card stock, an ordinary inkjet or laser printer and a paper trimmer, a 50-card printable deck can be on your table in about an hour — and it will shuffle and handle like a deck, not like a pile of printouts.
This guide is for anyone who has bought a printable card deck, or is about to: picture cards for coaching and reflection, word cards, or a printable tarot deck. It covers how to print cards at home in seven steps, from choosing paper to rounding the corners, and then covers card backs, print shops, on-screen use and the problems that turn up most often.
Key takeaways
- The one setting that matters most in how to print cards at home is scale: 100% or Actual size, never Fit to page.
- Use 250–300 gsm matte card stock. If your printer cannot feed it, print on 160–200 gsm and laminate.
- Print one test sheet on plain paper and measure a card before you use the good paper.
- Card backs are optional. If you print them, test the alignment with a single sheet first.
- A paper trimmer and a corner rounder make the biggest difference to how the finished deck feels.
Table of Contents
How to print cards at home: what you need
- The deck’s print file — one PDF, in the paper size your printer uses (A4 or US Letter).
- A printer — inkjet or laser. Check the heaviest paper it accepts; the figure is in the manual, given in gsm.
- Card stock — 250–300 gsm, matte, plus a few sheets of ordinary paper for tests.
- Something to cut with — a paper trimmer or guillotine, or a craft knife with a steel ruler and a cutting mat. Scissors work, more slowly.
- A ruler — to measure one card from the test sheet.
- Optional — a corner rounder, a laminator with pouches, card sleeves, and a box or pouch to keep the deck in.
What is inside a printable card deck
A printable deck is a set of files, not a single picture. Ours contain five, and most well-made decks are organised in a similar way:
| File | What it is for |
|---|---|
| Cards — US Letter | The whole deck on 8.5 × 11 in sheets, four cards per sheet, with grey cut lines |
| Cards — A4 | The same deck on 210 × 297 mm sheets. Print this one or the US Letter file, never both |
| Card backs | Optional back designs, four per sheet, to print on the reverse |
| Guide | How to use the cards, with printing notes |
| Screen images (ZIP) | Every card as a single image for tablets, phones and video calls. Not for printing |
Four cards per sheet means a 50-card deck prints on 13 sheets and a 78-card tarot deck on 20. Our picture and word cards are 3 × 4.5 in (76 × 114 mm), a little larger than a playing card. Our tarot cards are 3 × 4.2 in (76 × 107 mm).

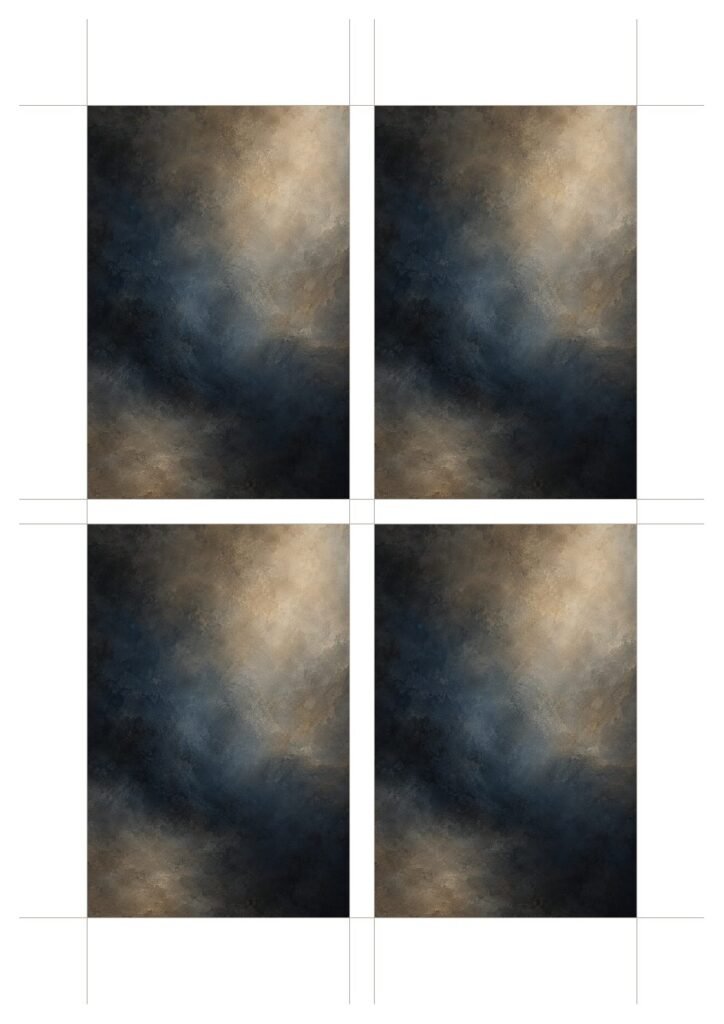
Use the file that matches the paper in your tray. A4 is standard in most of the world and Letter in the United States and Canada; the two paper sizes are close but not the same, and printing one file on the other paper forces the printer to shrink or crop the sheet.
Step 1: Choose the right card stock
Paper is the first decision in how to print cards at home, and it shapes how the deck feels in the hand more than anything else you do.
| Paper | What you get |
|---|---|
| 250–300 gsm, matte | The one to use. Shuffles properly, no image showing through from behind, no glare under a ceiling light |
| 160–200 gsm, matte | For printers that jam on heavier stock. Laminate or sleeve the cards afterwards and they handle just as well |
| Glossy or photo paper | Rich colour, but it catches the light, and photo paper can crack when bent. Avoid for cards you will use in sessions |
| Ordinary 80 gsm office paper | Test sheets only — too thin for a deck |
The number is grammage: the weight of one square metre of the paper, in grams. In the United States the same stock is usually sold as roughly 90–110 lb cover. Pound ratings mean different things for different paper types, so when in doubt go by the gsm figure on the pack.
Two practical checks before you buy. Look up the maximum paper weight for your printer, because many home models stop at around 200–250 gsm. And if your printer has a rear or manual feed slot, use it: a straighter paper path is far kinder to thick sheets.
Step 2: Set the printer to 100% — the key to how to print cards at home
Open the PDF in a proper PDF reader on a computer, not in a phone preview, and find the scaling option in the print dialog. Depending on the program it is called Actual size, 100%, Scale: 100 or None.
Never use Fit, Fit to page, Shrink oversized pages or Scale to fit. These quietly reduce the sheet by a few percent to clear the printer’s margins. The cards come out smaller than they should, card backs stop lining up, and sleeves and boxes no longer fit.
Three more settings are worth a moment:
- Paper size: A4 or Letter, matching both the file and the paper in the tray.
- Paper type: choose card stock, heavy paper or matte. The printer slows down and lays the ink correctly.
- Quality: high or best. Single-sided, unless you are printing the backs in the same pass.
Step 3: Print one test sheet
Print the first page on ordinary paper with the settings you have just chosen, and measure one card with a ruler. A picture card from our decks should be exactly 3 × 4.5 in (76 × 114 mm), and a tarot card 3 × 4.2 in (76 × 107 mm). If yours is smaller, scaling is still switched on somewhere.
Check two more things while you are there: that nothing is cut off at the edge of the sheet, and that the colours look roughly as expected. A test sheet costs almost nothing. A full deck printed at 97% costs thirteen sheets of card and an evening.
Step 4: Print the deck
Load a few sheets of card stock at a time; a full tray of heavy paper is the commonest cause of jams. If the printer struggles, feed one sheet at a time.
Let inkjet prints dry flat for several minutes before you stack them, and longer if the images are dark. Keep the sheets in order as they come out, particularly if you plan to print backs on them.
Step 5: Decide what to do about card backs
Backs are optional, and there are three sensible ways to handle them.
| Option | How it works, and when to choose it |
|---|---|
| Leave them white | The quickest option, with nothing to align. Perfectly good when cards are chosen face up, and what many coaches end up doing |
| Print double-sided | Print the card sheets, feed the same sheets back in, and print the backs file on the reverse. Gives a real deck feel for face-down draws |
| Print separately and glue | Print fronts and backs on lighter paper, glue the sheets back to back with the cut lines lined up against a window, then cut. Slower, but the alignment is exact and the cards are very stiff |
If you print double-sided, follow the flip instruction that comes with your deck. It is printed on the back sheets or given in the guide, and it differs from deck to deck, short edge for some and long edge for others. Whatever it says, try one sheet first. Most home printers shift the second side by a millimetre or two, and every model does it differently.
Two smaller points. Dark back designs use a great deal of ink, so choose a pale one if you print often. And if you read tarot with reversals, use a reversible back — one that looks the same either way up — so the back never tells you which way a card will land.
Step 6: Cut the cards
A paper trimmer or guillotine gives the cleanest edge. A craft knife against a steel ruler on a cutting mat is just as good with a little care. Scissors are fine for one deck.
- Make the long cuts first, right across the sheet, then the short ones.
- Cut on the grey line, not beside it. The line leaves with the offcut.
- Cut one sheet at a time. Stacked card stock makes the blade wander.
- Use the gap. On our sheets there is a white strip between the cards, so one wobble never spoils two of them.
Thirteen sheets take about twenty minutes with a trimmer.
Step 7: Finish the deck — corners, laminating and sleeves
Round the corners. This is the one optional step that makes a home-printed deck feel manufactured. A 3 mm corner punch is the usual size for picture cards, and 5 mm (¼ in) suits tarot cards. Rounded corners also hide small cutting errors and stop the cards catching when you shuffle.
Laminate, if the deck will work hard. It is worth it for cards used with clients or in groups. Cut the cards first, then laminate them: 80-micron pouches stay flexible enough to shuffle, while 125-micron pouches give a rigid card that lasts longer but handles like a coaster. Leave a sealed margin of about 2 mm around each card so the laminate cannot peel. Matte pouches avoid glare.
Or use sleeves. Clear card sleeves protect a deck without heat. Buy them by measurement: standard playing-card sleeves are too small for cards that are 76 mm wide.
Store it flat. A small box, a cloth pouch or a wide elastic band keeps the cards flat and together.
Using a print shop instead
You do not have to work out how to print cards at home at all. A print shop is a good choice if your printer cannot take card stock, if you want heavier paper, or if you need several decks for a team or a training group.
For Open Meaning Cards decks, having your own copy printed by a shop counts as personal use: the licence lets you print as many copies as you need for yourself and your own practice, and it does not allow sharing or reselling the files. Other publishers set their own terms, so check before you send a file anywhere.
What to ask for:
- The A4 or US Letter cards PDF, printed in colour at 100% / actual size, with no scaling or cropping.
- 300 gsm matte or silk card stock, single-sided, or double-sided if you also supply the backs file.
- One proof sheet before the full run, so you can measure a card.
- Trimming to the cut lines, if they offer it. Many shops will cut for a small fee; otherwise cut at home.
Using the screen images without printing anything
You do not have to print a deck to start using it. The screen images are single pictures of every card, made for tablets, phones and video calls. Open one full screen and it does everything a printed card does.
For online sessions, share one image at a time, or ask the other person for a number and open that card for a blind draw. How to Use MAC Cards in Coaching has more on running a card session over video.
How to print cards at home when things go wrong: troubleshooting
| Problem | Likely cause | Fix |
|---|---|---|
| Cards are smaller than they should be | Scaling is on | Set 100% or Actual size and print another test sheet |
| An edge of the sheet is cut off | Wrong paper size, or borderless mode | Match A4 or Letter to the file and paper; switch borderless printing off |
| Backs do not line up | The printer shifts the second side, or the flip edge is wrong | Test one sheet, try the other flip setting, or turn the paper the other way round. Failing that, glue or leave the backs white |
| Paper jams | Stock too heavy for the paper path | Use the rear feed, one sheet at a time, or drop to 160–200 gsm and laminate |
| Cards curl | Moisture from the ink | Dry flat, then press under heavy books overnight |
| Colours look dull or dark | Plain-paper setting, or a bright screen | Set the paper type and best quality. Paper never matches a backlit screen exactly |
| Ink smears | Not dry, or printed on the wrong side of coated stock | Leave it longer; check which side is the printable one |
| Streaks or bands | Low ink or blocked nozzles | Run the printer’s nozzle check and cleaning cycle |
Common mistakes when you print cards at home
- Printing both the A4 and the Letter file. They are the same deck. Choose one.
- Skipping the test sheet. It is the cheapest insurance there is.
- Trusting “Fit to page”. It sounds helpful and it is the cause of most sizing problems.
- Choosing glossy paper for session cards. A person tilting a card to see past a reflection has stopped looking at the image.
- Cutting beside the line. Cut on it, and every card comes out the same size.
- Printing dark backs for every deck. They drink ink. Pale backs, or none, are kinder to the cartridge.
Which decks can you print?
Every Open Meaning Cards deck is a printable card deck: A4 and US Letter sheets with cut lines, card backs, and screen images for use online. Everything in this guide on how to print cards at home applies to all of them.
| Collection | Decks | Print format |
|---|---|---|
| Coaching and therapy tools | Inner Weather · Undercurrent · Words | 50 cards · 3 × 4.5 in · 13 sheets |
| Self-discovery | Crossroads · Surreal & Fractal · Personal Space | 50 cards · 3 × 4.5 in · 13 sheets |
| Tarot | Celtic Dragon Tarot, Beige and Ash editions | 78 cards · 3 × 4.2 in · 20 sheets · reversible back |
New to picture cards altogether? What Are Metaphorical Associative Cards? explains what they are and how they are used. And if a file does not print the way this guide describes, get in touch and we will help.
Frequently asked questions
What paper is best for printing cards at home?
Matte card stock of 250–300 gsm, which is roughly 90–110 lb cover. It is stiff enough to shuffle, opaque enough that the image does not show through, and free of glare. If your printer cannot feed paper that heavy, use 160–200 gsm and laminate or sleeve the cards.
Should I print at 100% or fit to page?
Always 100%, also called Actual size or No scaling. Fit to page shrinks the sheet by a few percent to clear the printer’s margins, so the cards come out smaller than intended and the backs no longer line up. Print one test sheet and measure a card to be sure.
How do I print double-sided cards so the backs line up?
Print the card sheets first, then feed the same sheets back in and print the backs file on the reverse, using the flip edge your deck’s instructions name. Test a single sheet before the full run, because most printers shift the second side by a millimetre or two. If yours will not align, glue separately printed backs to the fronts, or leave the backs white.
How to print cards at home without a printer that takes card stock?
Print on the heaviest paper your printer accepts, then stiffen the cards afterwards. You can laminate them, slip them into sleeves with a piece of card behind each one, or glue the printed sheet to card before cutting. A print shop is the other option.
Can a print shop print my digital deck?
Usually, yes, as long as the deck’s licence allows printing for personal use. Ask for the PDF to be printed at 100% with no scaling on 300 gsm matte card stock, and request one proof sheet first. Some shops ask to see the licence terms, which are normally in the guide that comes with the deck.
Do I need to laminate printable cards?
No. Cards printed on 250–300 gsm stock last well with ordinary handling. Laminating is worth it for decks used often with clients, with children or in groups, and for cards printed on lighter paper. Use 80-micron pouches if you want to keep shuffling them.
Related reading
- What Are Metaphorical Associative Cards? The Ultimate Beginner’s Guide — what the cards are, and why they have no fixed meanings.
- How to Use MAC Cards in Coaching: A Complete 5-Step Session Guide — what to do with the deck once it is printed, in person or online.
- The card decks — printable decks for coaching, self-discovery and tarot.
Closing
Once you know how to print cards at home, the whole job fits into an evening: the right paper, 100% scale, one test sheet, clean cuts and rounded corners. None of it needs special equipment, and the result is a deck you can replace card by card for as long as you own the files.
Start with the test sheet. Print one page on ordinary paper tonight, measure a card, and you will know that everything after it will work.